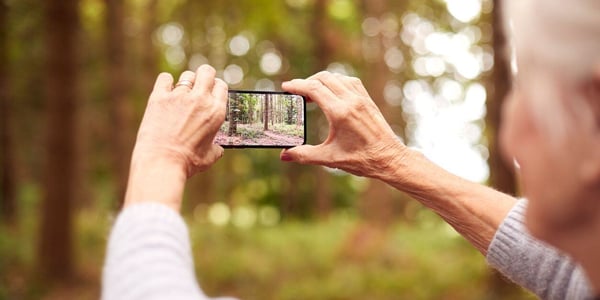
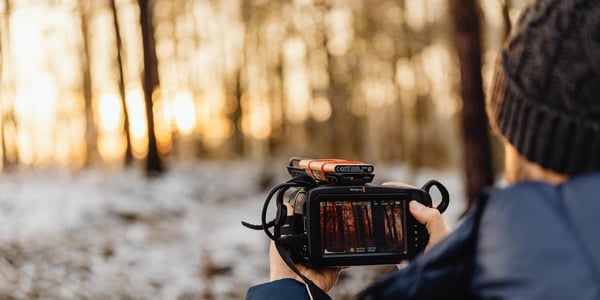
Smartphone photography has come a long way, transforming everyday phone users into amateur...
Positive Ways to Cope with COVID-19 Isolation: Part 2 - Family Photo Archive
Sheltering in place because of COVID-19 can provide an opportunity to finally catalog those years of photos. Too often, photos handed down to the next generation are discarded because there is no information about people and places.
These days, photo storage is a combination of physical and digital. Each type of photo storage has its own process for adding information about an image.
Tips to Properly Archive Your Family Photos
Physical Photos
- Information is g
 enerally written on the back of a photo. It is recommended to do this even if the photo is intended for an annotated album. Albums are sometimes deconstructed in the future, and only the pictures retained.
 - Use a pen because a pencil often requires the writer to press down too hard, thereby damaging the front of the picture. Be careful about the type of pen used. Some inks smear easily.
- At a minimum, write basic details such as people in the picture, the location of the photo, and date.
- Add details about special occasions or trips. This provides context that richly enhances the viewer's understanding.
- Point out relationships between people in the pictures, especially those who may not be familiar to the next generation.
- Organizing photos by time period is helpful but not essential if dates (or at least year) are noted on the back of the picture.
- Consider scanning physical photos and negatives to a digital format. Adding extra information about each digital image is covered in the next section.
Digital Photos
For many, the days of physical photo albums are over. With the rise of smartphone cameras, photos today are almost exclusively digital. They can be stored on a computer hard drive or in the cloud on a photo storage/sharing website. .jpg?width=300&name=download%20(1).jpg) While digital photos are easy to share across phones, on social media, cloud storage sites, or other digital devices, it frequently leaves a gap when it comes to information about the photos. Physical photos allow the reverse side of snapshots to record valuable information about the people, places, and events. For digital images, a different method must be used.
While digital photos are easy to share across phones, on social media, cloud storage sites, or other digital devices, it frequently leaves a gap when it comes to information about the photos. Physical photos allow the reverse side of snapshots to record valuable information about the people, places, and events. For digital images, a different method must be used.
With digital, a wealth of data is captured about the photo, such as date, time, shutter speed, and even geographical coordinates. Yet, the fact that it's a photo of Aunt Sally on vacation in Montana the day she found someone's lost wedding ring will never be known to future generations. Here are some guidelines for adding information to digital photos:
- All digital cameras assign a unique file name to each photo. An example is "DISC0002.jpg". The simplest way to provide more useful information is to rename the photo file. The file can be renamed to "Utah Vacation Rest Stop Picnic.jpg".
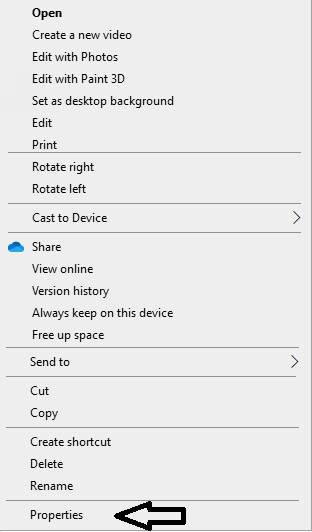
- To do this on a hard drive, right-click on the picture. Click Rename at the bottom of the menu.
- To add more information about the photo, click Properties at the bottom of the menu.

-
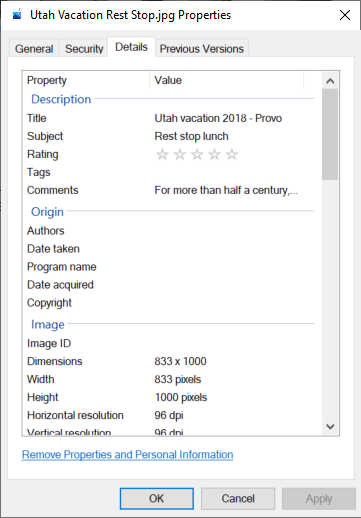
- In Properties, click on Details.

- In the section at the top marked Description, all the entries (called metadata) can be edited and searched:
- Title – This is not the file name. This a free text entry, but long entries would be hard to read since the text window does not expand.
- Subject – This can be whatever subject text desired, but like title, the text window does not expand.
- Rating – zero to five stars
- Tags- This a free text entry, and the text window expands for long entries. However, by their nature, tags are intended for searching, so shorter tags are easier to manage.
- Comment - This a free text entry, and the text window expands for long entries. Here is an ideal place to record detailed descriptions of the photo.
Online storage sites like Google Photos or Amazon Photos provide easy ways to annotate images. Click on the picture to select it. There is usually a menu option or icon named Info or something similar that allows descriptions of the photo to be entered.
Some additional tips for digital photos:
- Don't rely only on one online service. Use at least two to have a duplicate set in case of disaster. Just be sure to save a third set on an external hard drive at home.
- Consider setting up an automatic online backup of smartphone photos. This way, every photograph is saved in the cloud so the smartphone storage can be pruned periodically to save space.
- If using a dedicated digital camera, get in the habit of uploading the images to a hard drive or cloud drive as soon as possible after taking the pictures. Too often, months of photos pile up on the camera memory card and not enjoyed. Some cameras connect to Wi-Fi directly for such uploads.
Enjoying the Photos
Physical photos can be enjoyed as loose pictures or in albums. Albums are more work to put together. However, whether they are simple photo sleeve pages or elaborate captioned scrapbooks, the extra work to organize the images will be appreciated by viewers for years to come.
Digital photos have many more options:
- Online photo sharing can be ongoing, like Facebook or Instagram.
- Photo websites like Cluster allow private sharing and online album creation among designated groups.
- With websites like Shutterfly, albums can be created online and printed.
- Digital photo frames are a fantastic way to get new photos to loved ones wirelessly. These frames connect to Wi-Fi and download pictures instantly.
This is Part 2 of the Positive Ways to Cope with COVID-19 Isolation blog series. Click here to read Part 1, Technology Boost, or Part 3, Making a Memoir. To make sure you don't miss future posts, subscribe to our blog!


